Manage Email Templates
Location:
Settings → Manage Email Templates
Overview
The Manage Email Templates feature allows administrators to manage the email templates used by the Paytia platform when communicating with customers.
Templates can be customised to reflect your organisation's branding, messaging, and communication style while continuing to use Paytia's built-in variables to automatically populate customer and transaction information.
Typical email templates include:
- Customer payment receipts
- Payment link emails
- Payment link payment receipts
- Telephone payment receipts
- Re-run / Re-take payment receipts
This feature allows merchants to maintain a consistent brand experience while ensuring customers receive clear and professional communications.
Accessing Email Templates
Navigate to:
Settings → Manage Email Templates
The Email Templates page displays all templates available within your account.
Available information includes:
- Template Name
- Template Description
- Publication Status
- Date Created
- Available Actions
Templates can also be filtered using the search options provided.
Available Actions
Each template provides two available actions.
Preview
The Preview button allows you to view the current published version of the email template.
Preview is useful for:
- Checking the overall design
- Reviewing wording
- Verifying branding
- Confirming variable placement
- Checking formatting before making changes
Preview is read-only and does not allow editing.
Clone
The Clone button creates a copy of an existing email template.
This is the recommended method for making changes.
Rather than editing a live template directly, cloning allows you to:
- Preserve the existing published template
- Create a working copy
- Make changes safely
- Test the design
- Publish the new version once approved
Using cloned templates reduces the risk of accidental changes affecting customer emails.
Editing a Template
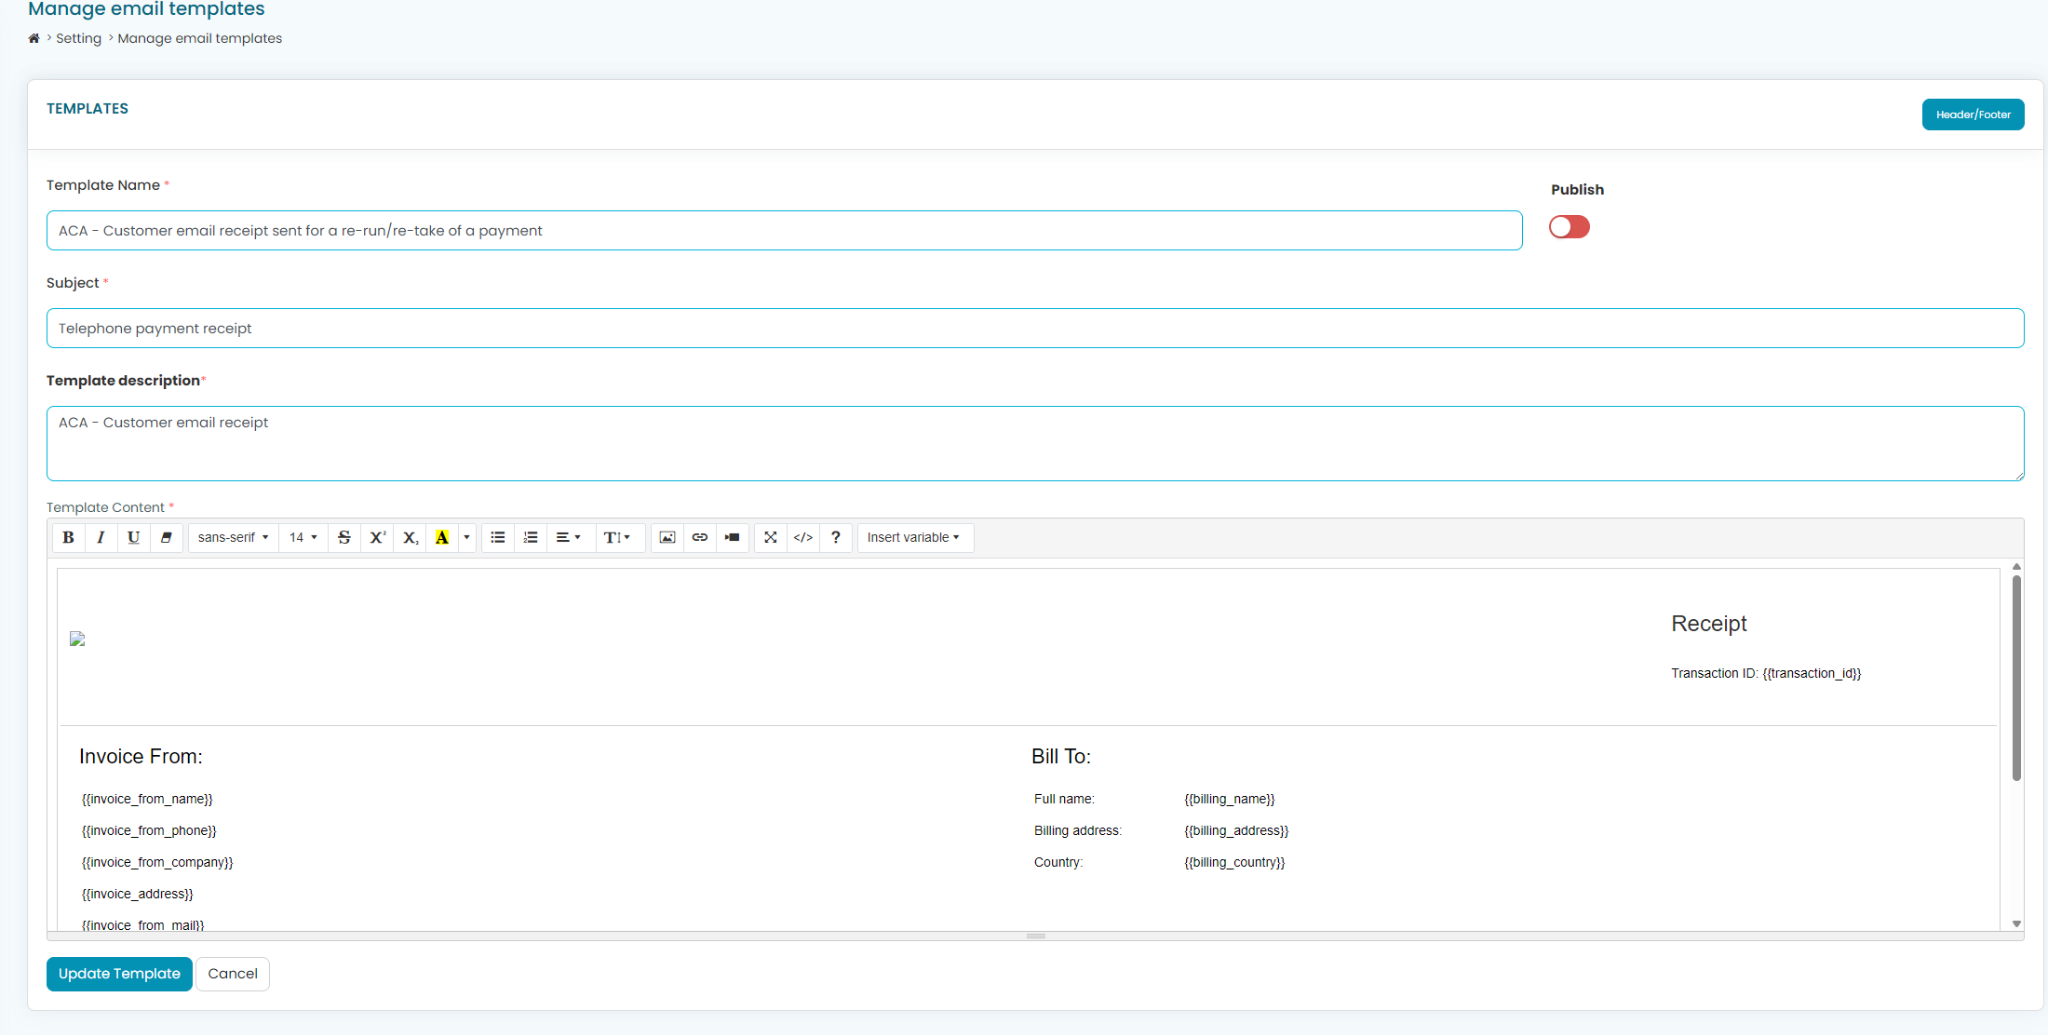
When editing a template you can modify:
- Template Name
- Email Subject
- Template Description
- Email Body
- HTML formatting
- Images
- Company branding
- Colours
- Fonts
- Hyperlinks
The editor includes a standard rich text toolbar for formatting content.
Paytia variables can also be inserted using the Insert Variable menu.
These variables are automatically replaced with live transaction information when the email is sent.
Examples include:
- Customer name
- Transaction ID
- Payment amount
- Invoice information
- Merchant information
- Billing details
Publishing Templates
Each template includes a Publish option.
When enabled, the template becomes the active version used by Paytia for future emails of that type.
Only published templates are used for outgoing customer communications.
It is recommended that templates are fully reviewed before publishing.
Header and Footer
The Header/Footer button allows you to manage common content used across multiple email templates.
Typical items include:
- Company logo
- Contact details
- Disclaimer text
- Footer information
- Branding
- Social media links
Using a shared header and footer provides a consistent appearance across all customer emails.
Best Practice
Paytia recommends the following workflow when modifying email templates:
- Locate the existing template.
- Select Clone.
- Edit the cloned version.
- Review the template using Preview.
- Verify branding, variables and formatting.
- Publish the new template when testing is complete.
This approach ensures the existing live template remains available until the replacement has been approved.
Notes
- Changes only affect future emails sent after the template is published.
- Existing emails already sent to customers cannot be changed.
- Ensure all variables remain intact, as removing required variables may result in missing information within customer emails.
- If custom HTML is used, it should be tested across common email clients before publishing.
Frequently Asked Questions
Can I edit the default template?
The recommended approach is to clone the existing template and publish the cloned version once your changes have been completed and reviewed.
What happens if I publish a new template?
The newly published template immediately becomes the version used for all future emails of that template type.
Previously sent emails are not affected.
Can I restore an older template?
If an earlier version has been retained by cloning rather than editing, it can simply be republished.
Can I customise the email branding?
Yes. Templates can be customised with your own:
- Company logo
- Colours
- Fonts
- Wording
- Contact information
- Images
- Links
while continuing to use Paytia's dynamic variables to populate transaction information automatically.